


For a while now, I have been thinking about adding some extra public IP addresses and redundancy to the internet connectivity.
Currently the internet connection is a single symmetrical 1gbit FTTH connection from Dutch internet provider Tweak. I connected the fiber directly into a switch where the two VLANS they provide are split: VLAN34 for internet goes directly to the OPNSense firewall, while VLAN4 (and 34) go to the provider supplied router for IPTV.
This setup works great and Tweak provides a super stable connection, single static IPv4 and native IPv6, but it would be nice to have some redundancy and extra public IP addresses.
After a bit of investigation and ruling out the usual providers (they are either on the same FTTH infrastructure, so no real redundancy, or using cable resulting in very poor upload speeds) I started looking into providers using their own network instead of the KPN infrastructure that most providers use in this area. This lead me to some very expensive DIA (Dedicated Internet Access) providers which made me wondering …
What would it take to become my own internet provider?
I have been exploring the internet since the early 90’s so wouldn’t it be cool to “own” a part of it? It became obvious very soon that it would certainly not be cheaper than DIA but it’s definitely a lot more fun and I’d probably learn a lot, so let’s go for it.
There’s a lot to know but after figuring everything out I followed these steps:
1. Apply for an ASN (Autonomous System Number)
Since the internet is built of small networks all connected together, each network is called an Autonomous System and is allocated a unique number. Each AS must have it’s own routing policy dictating how it connects to all other networks.
Internet resources like IP Addresses and AS Numbers (but also things like top level domain names) are controlled by IANA (Internet Assigned Numbers Authority) which on their turn allocate IP blocks to 5 RIR’s (Regional Internet Registries). The RIR for Europe is RIPE NCC to which I applied to become a LIR (Local Internet Registries). There is also the option to use a sponsoring LIR to get an ASN, this is cheaper but you wont get a free IPv4 / IPv6 block and some other benefits.
After paying the signup fee and membership I was awarded AS200232 and good to go ahead. I also created a small website – AS200232.net – to keep track of progress and connectivity.
2. IP Addressing and the IPv4 struggle
One of the benefits of becoming a full RIPE member is the ability to directly request my own IP ranges without charge. The limit as it stands now is a /29 (/32 minimum) IPv6 block and a /24 IPv4 block without further justification.
Easy, right? But… wait… since IPv4 addresses have run out for a while now, RIPE needs to recycle IP’s that get returned into the pool (for example when members close down, return IP’s or go out of business) and there is a waiting list. Long story short it will probably take upto 2 years before I get my IPv4 block assigned, if ever.
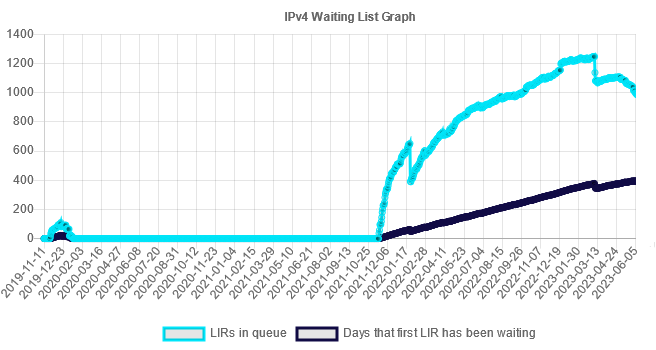
Since IPv6 Adoption is going very slow, building an IPv6 only network isn’t really an option and waiting two years isn’t either, so the only way forward is getting another /24 IPv4 block (which is the smalles routable block in the BGP table) on the free market. IP Addresses can be bought or rented and although it was very expensive I thought buying would make the most sense financially in the long run as I don’t think IPv4 will simply disappear or be redundant in the next years.
3. Get a router big enough to handle the full Internet routing table
To connect to other networks on the internet, the BGP (Border Gateway Protocol) is used. Each network feeds it’s own routing information in the global BGP routing table and this way a “full view” of the internet is created. This means the global routing table contains the massive amount of over 900.000 routes currently, and it is expected the 1.000.000 mark will be reached in 2024.
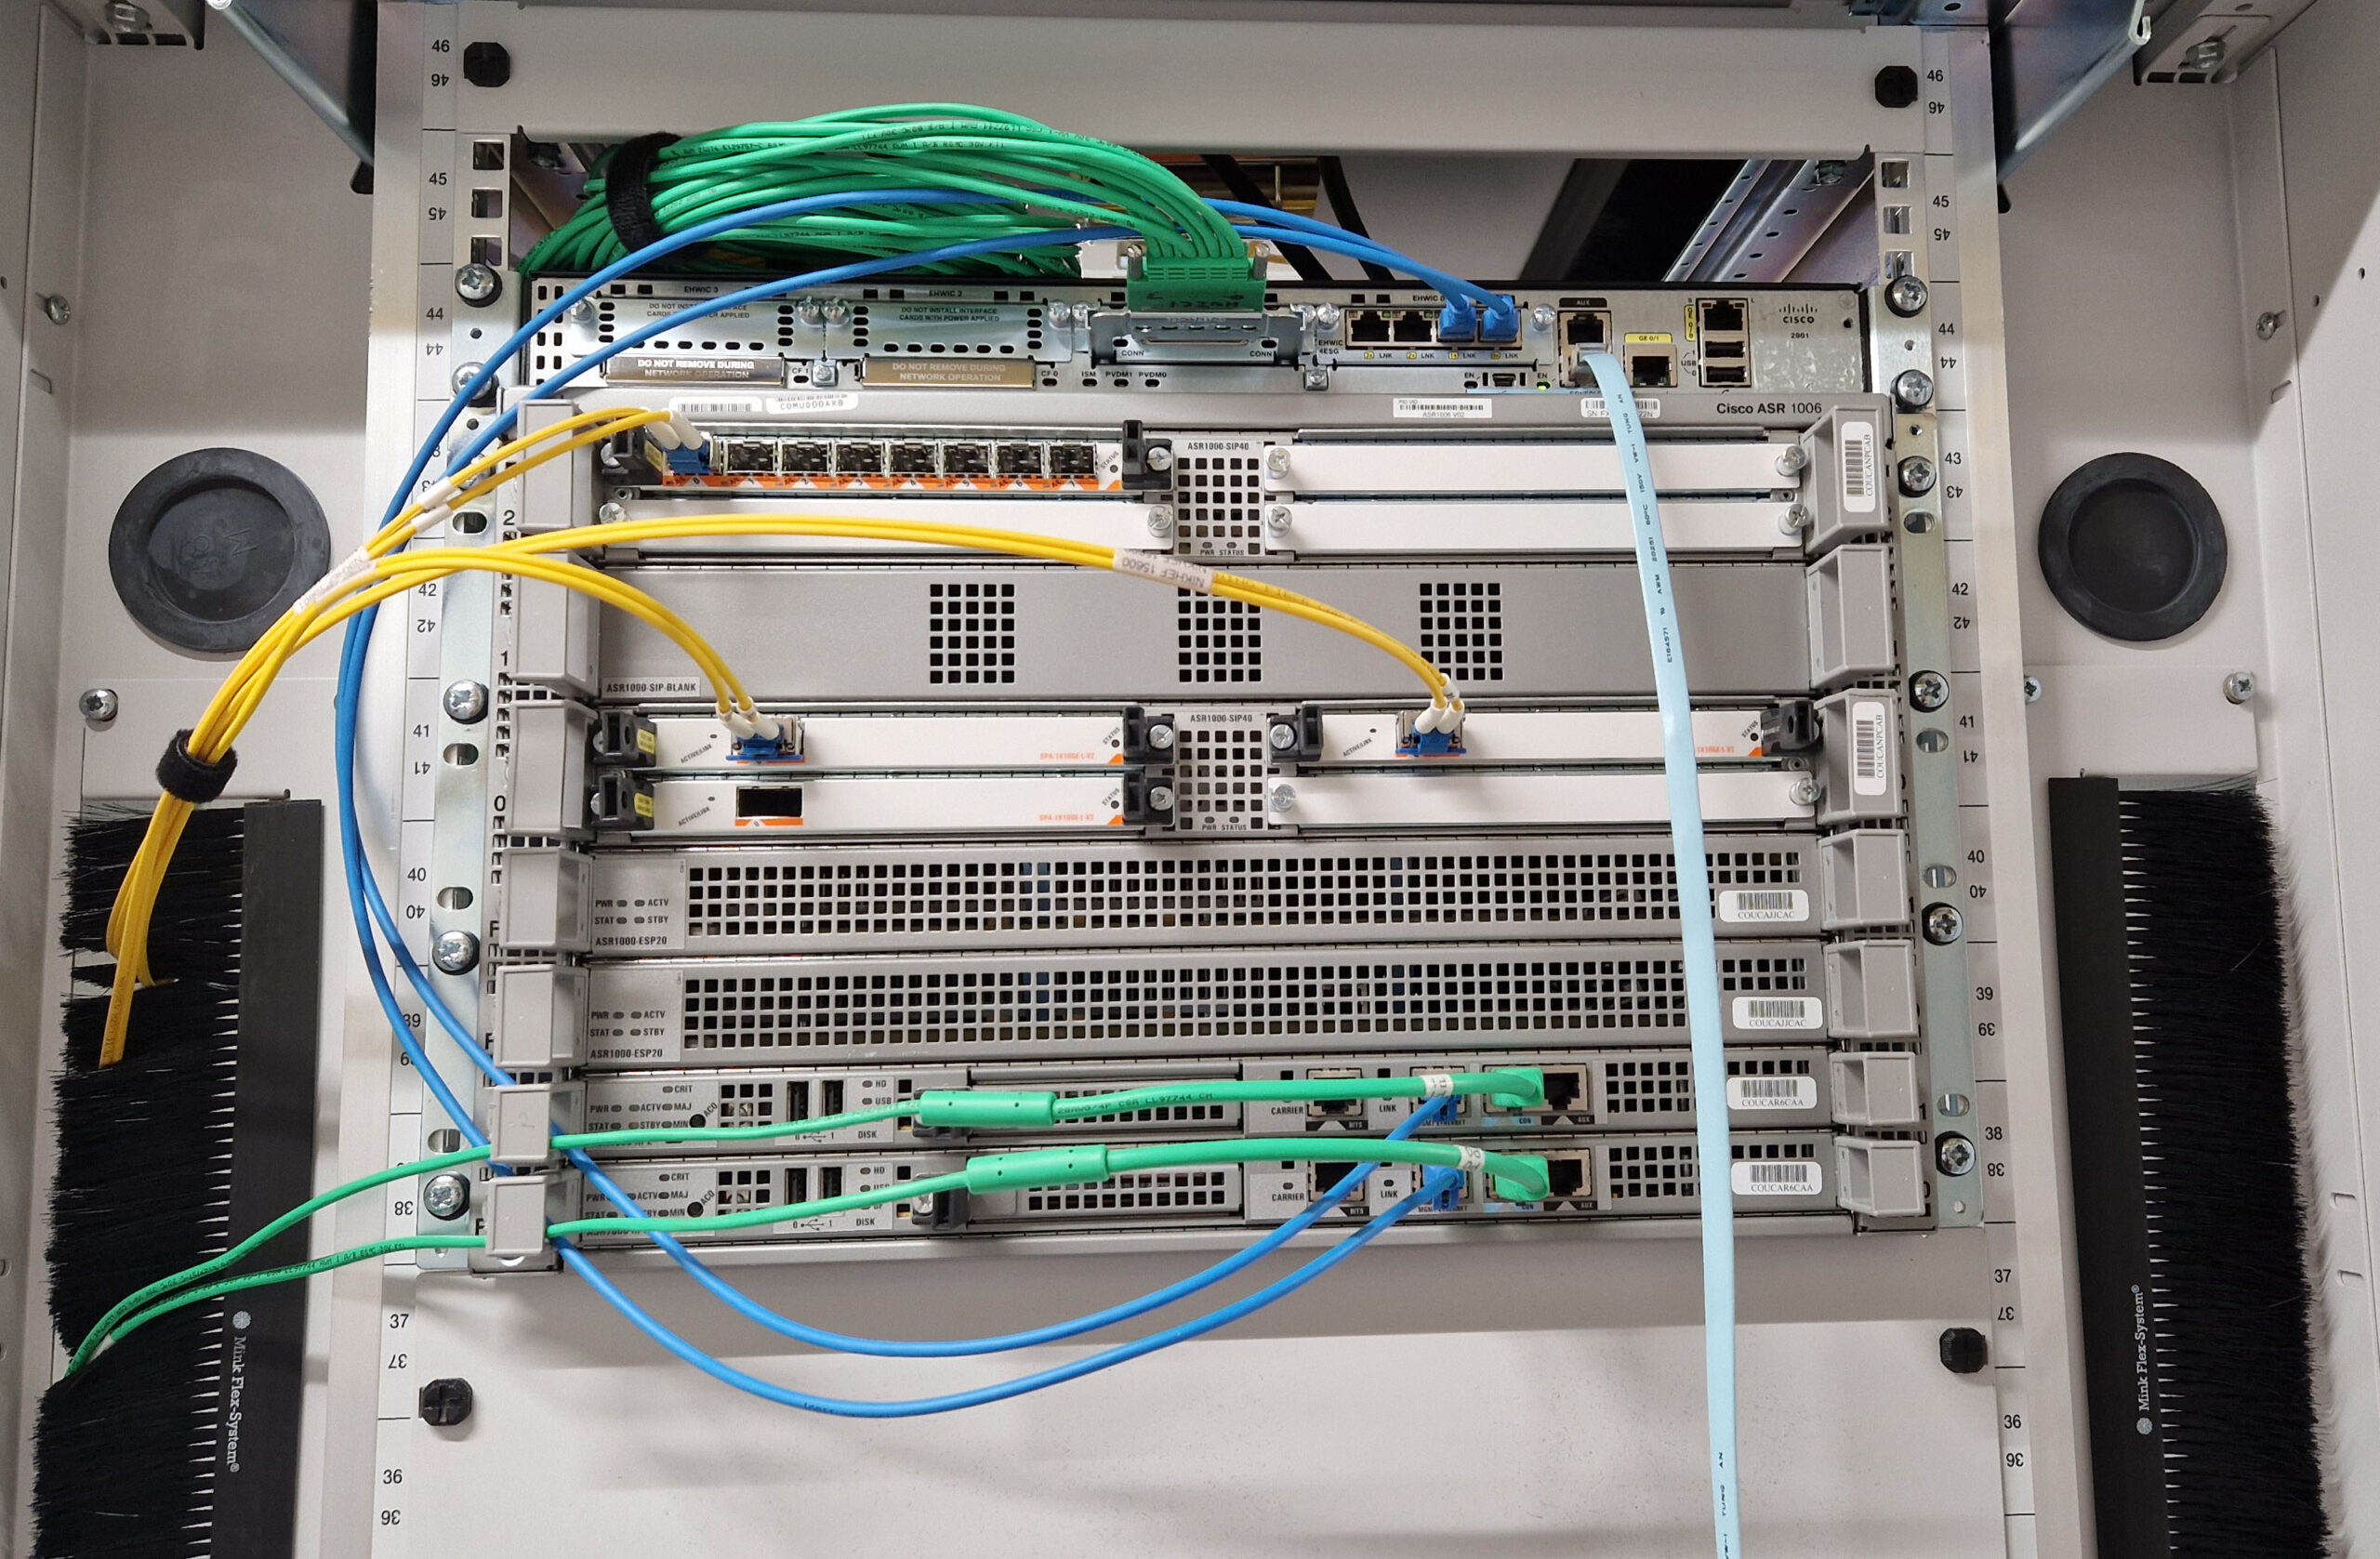
To be able to process al these routes, route changes and traffic requires a lot more than your average home router. Having quite some experiënce with Cisco equipment I found the Cisco ASR range would be a good match and I finally settled with the ASR1006 chassis as a Core Router:
– Old enough to be somewhat affordable and new enough to be still supported for at least a few years
– Redundancy throughout the chassis (especially important since I will start with only one router)
– Wide range of connectivity and a decent amount of ports
– Modular design so I could start with a few modules and expand later
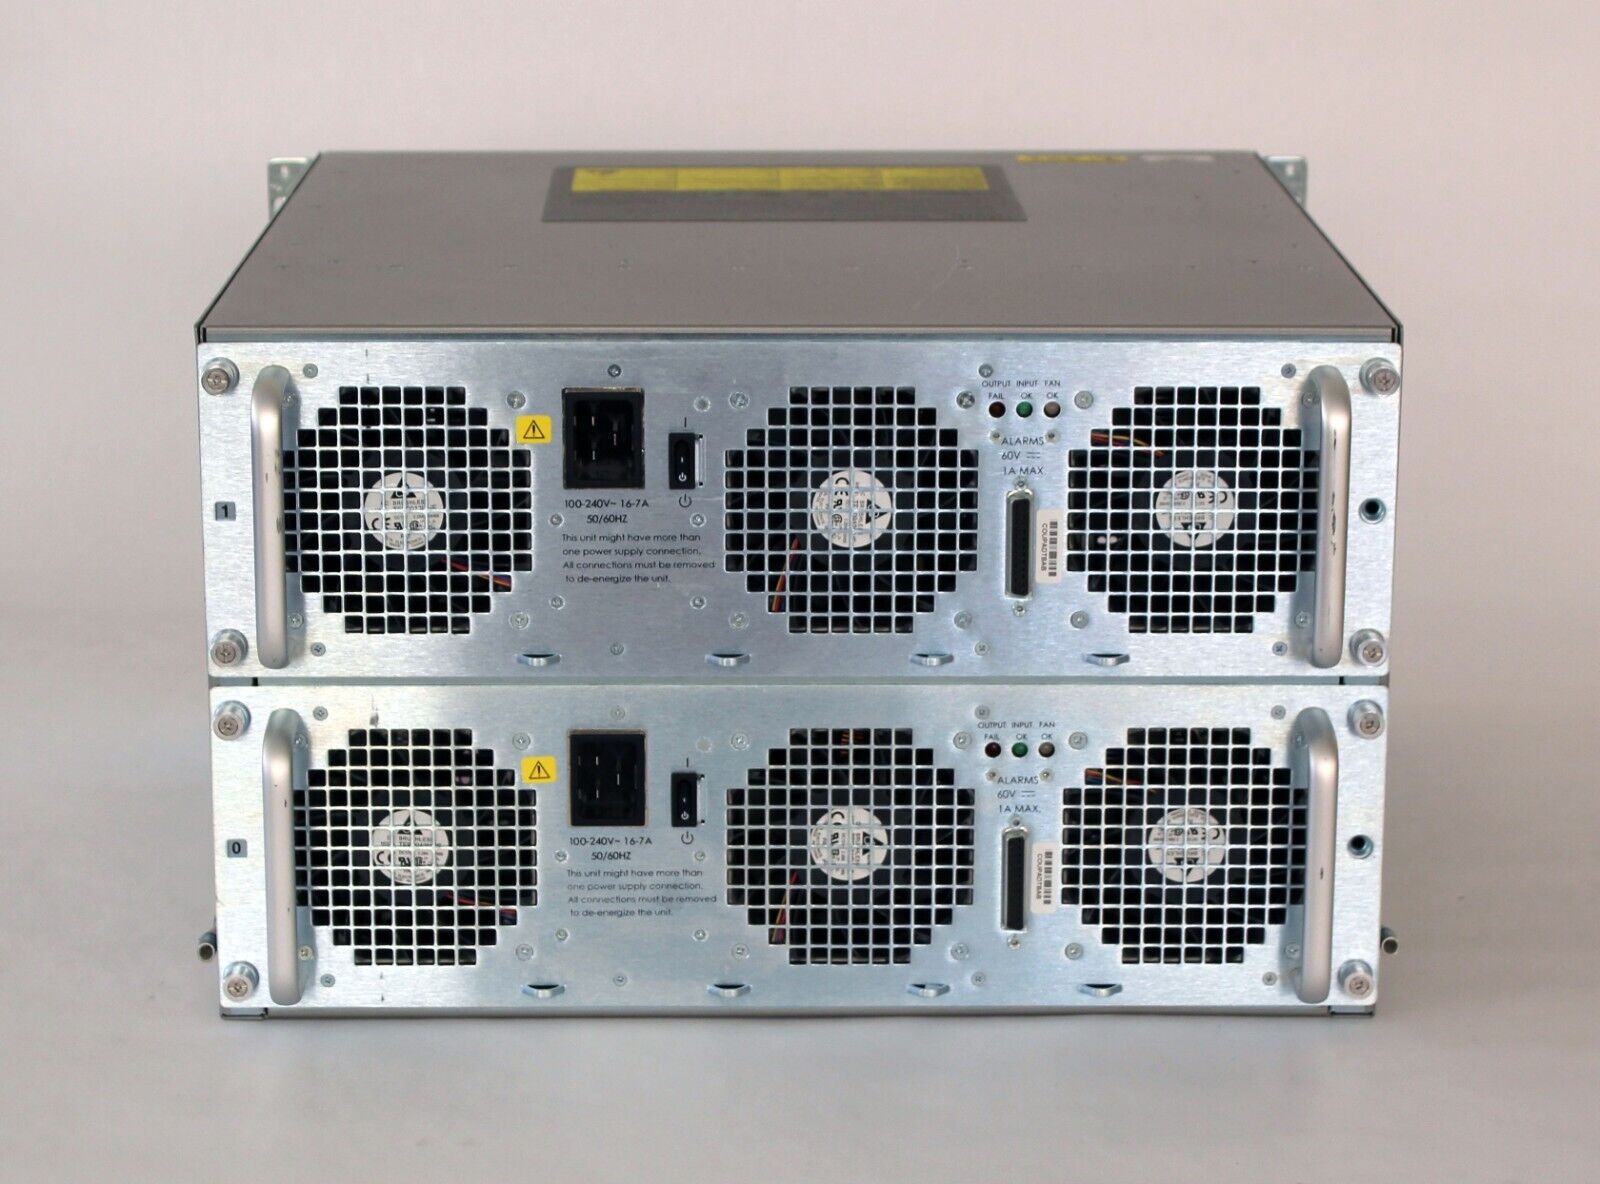
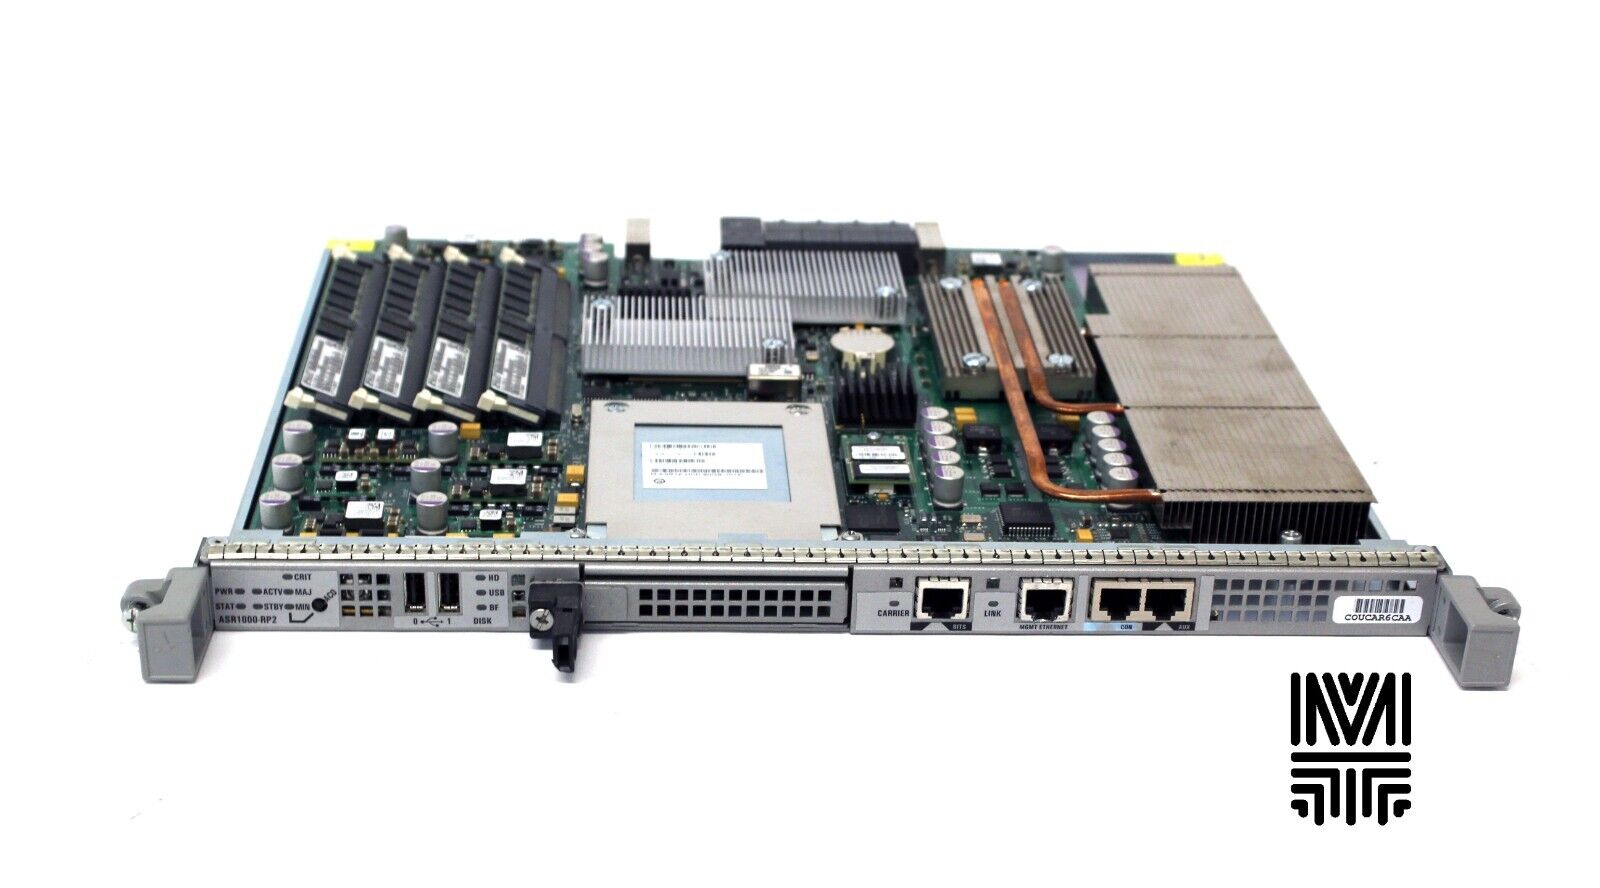
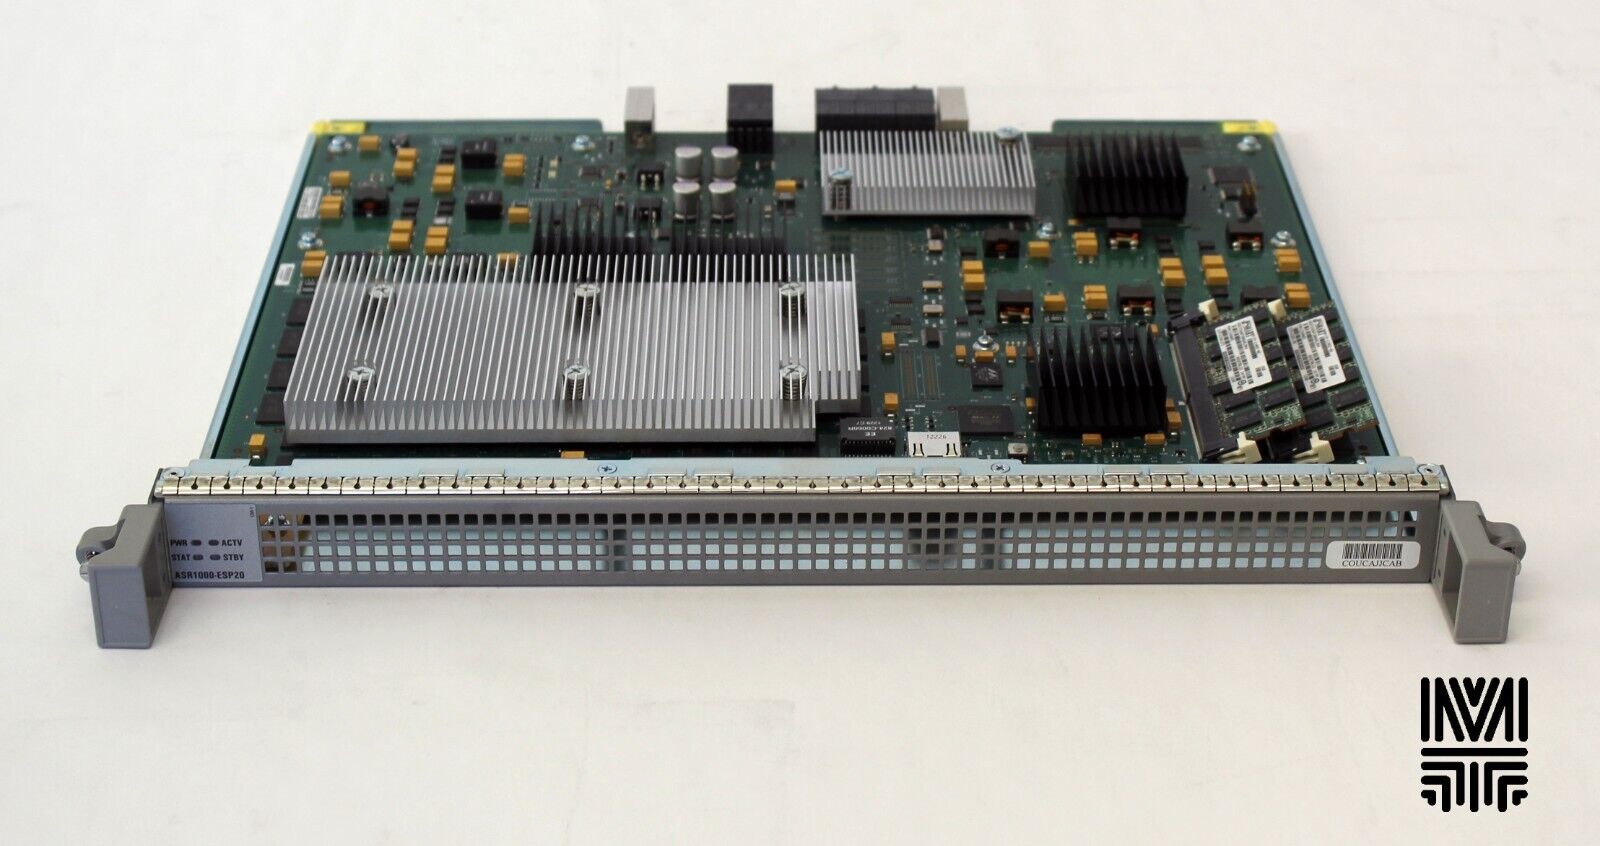
The final parts list:
– 1x Cisco ASR1006 Chassis w. Dual PSU
– 2x Cisco ASR1000-RP2 Route Processors
– 2x Cisco ASR1000-ESP20 Embedded Service Processors
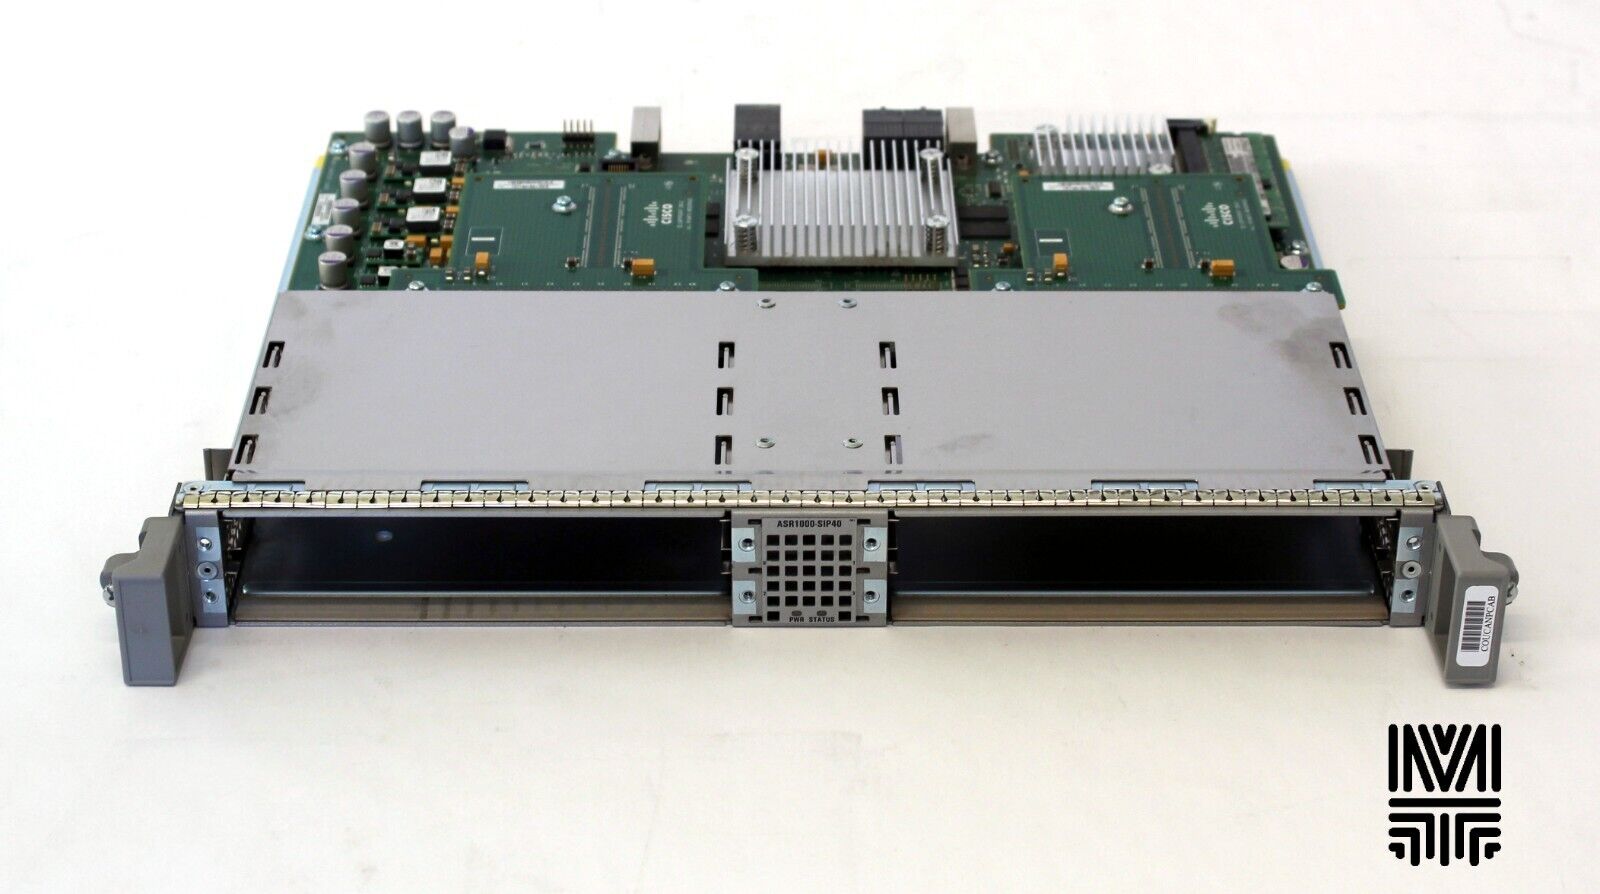
– 2x Cisco ASR1000-SIP40 Cards
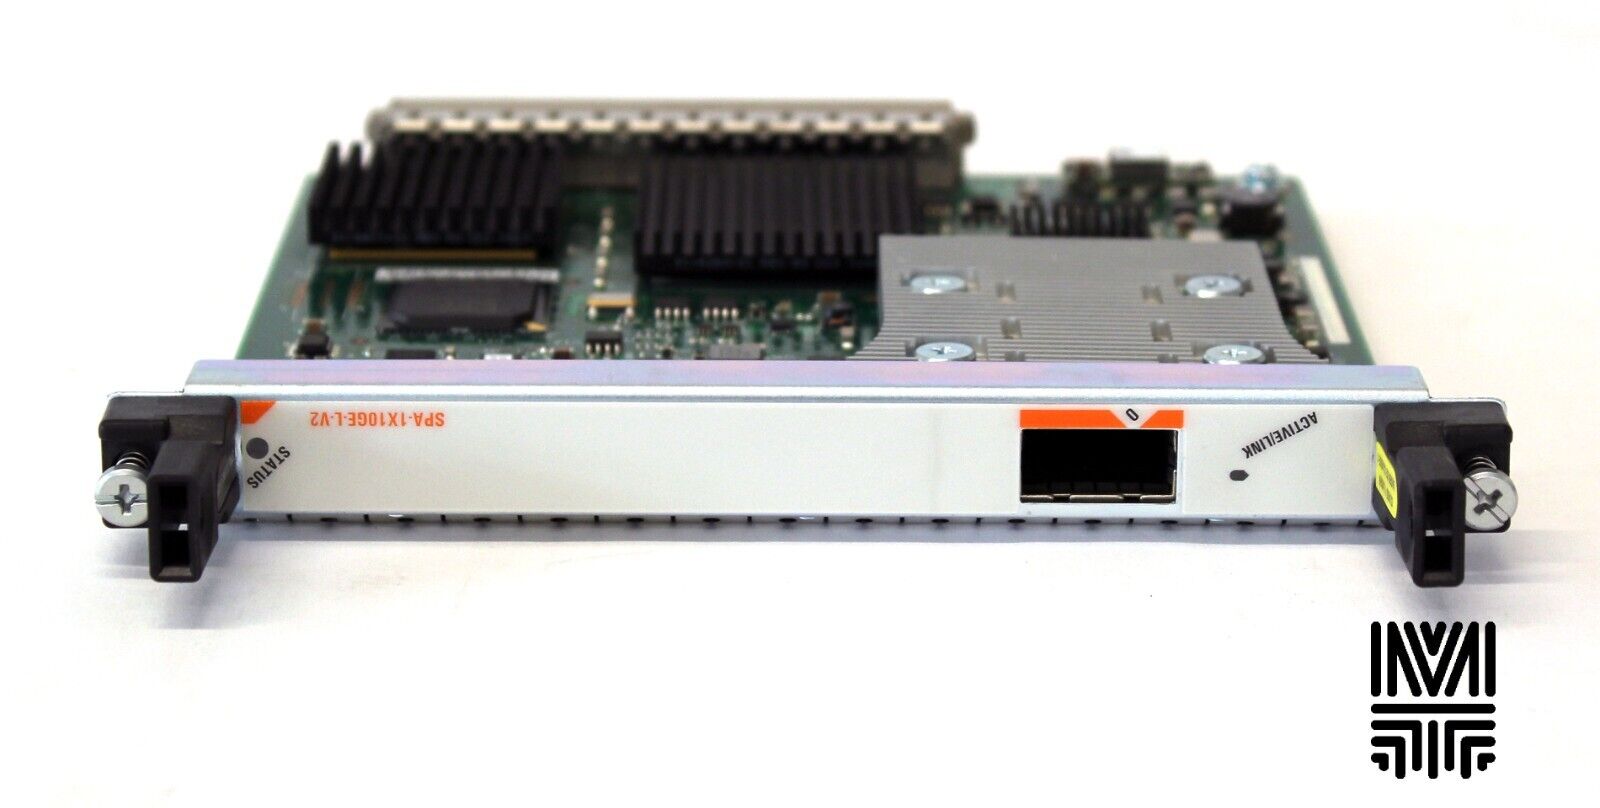
– 4x Cisco SPA-1x10G-L-V2 Linecards
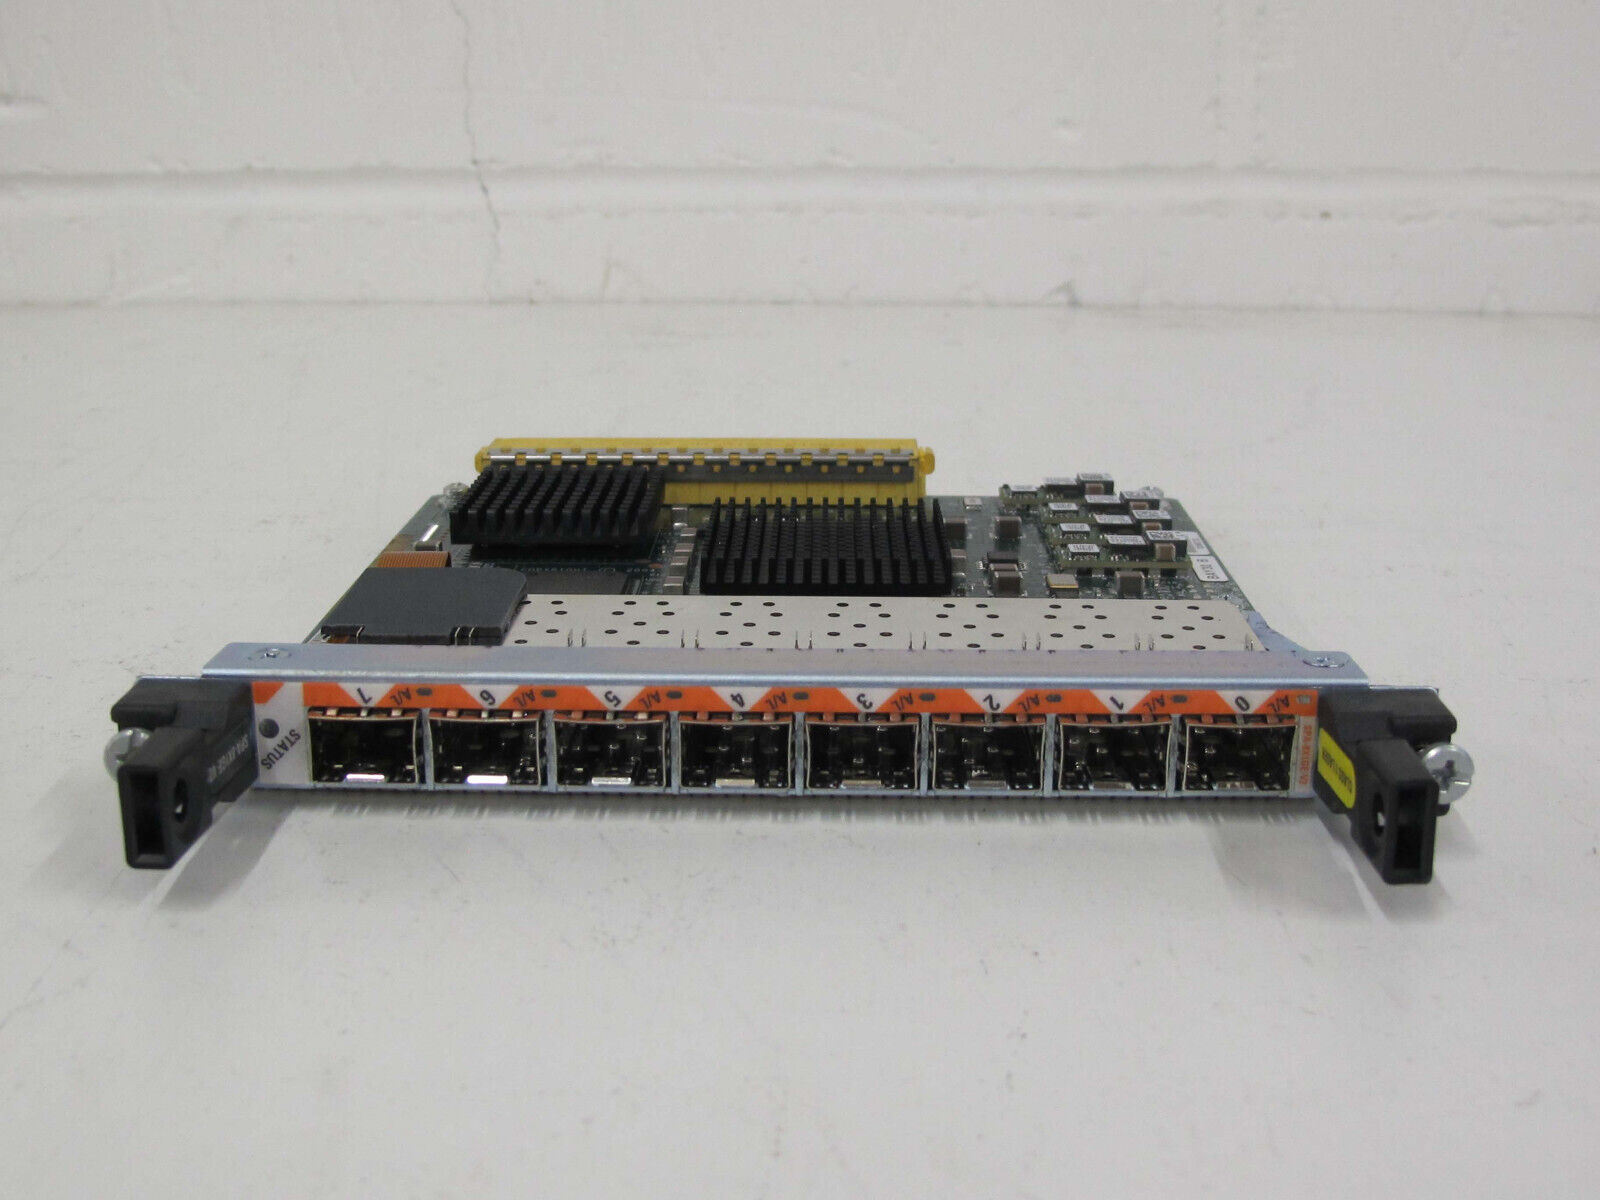
– 2x Cisco SPA-8x1G-V2 Linecards
– Blanks for the remaining slots

4. Arrange a co-location facility
Datacenters are to be found in many differerent flavours but one very important thing to notice is that I was not looking for a facility to put a rack of servers, requiring just power and one or two uplinks.
Since I’m located in The Netherlands there is really only one place to start, which is NIKHEF Housing. With more than 300 networks and 20 Internet Exchanges onsite according to PeeringDB, NIKHEF is probably one of the largest connectivity hubs that exists. The best part is that connectivity really is the only thing they focus on, resulting in very reasonable pricing.
After getting in touch and a bit of back and forth I signed a contract for a rack and that was officially the point of no return. After updates and initial configuration, CR1-NIK was racked in February 2023.
5. Get connected (Transit and Peering)
So, now I had my own AS, IP Space and Rackspace, time to get connected!
RIPE requires at least two Transit providers (those are providers that you pay to send you the full routing table and announce your network to the internet based on a committed data rate) which I found in Fusix (AS57866) Networks and IPng (AS8298). Fusix is a very stable and reliable connectivity provider from which I got reduntant uplinks to two of their locations and with IPng I got a somewhat more affordable solution which, for the time being, allows me to comply with the RIPE requirement of two independent transit providers.
Peering, on the other hand is a way to exchange traffic free of charge, but will not get you a full view of the internet. By connecting to another network using a cross connect (physical fiber cable between your and their router), traffic can be exchanged between these two networks for no additional costs. To make this process easier, Internet Exchanges were developed where all members mutually agree they will exchange traffic between their networks for no additional cost. While some Internet Exchanges charge a fee for their services, this will never add up to the costs and management involved to connect to each network seperately. To get started I decided to connect to Speed-IX and Frys-IX which both offer free ports.
Other things to consider are things are how to securely manage the equipment and what to do if something goes terribly wrong. To deal with this I added a simple Cisco ISR2901 router with a 4G module and some switch cards. All console and management ports are connected back to this “Out Of Band” router. To reach the management network I can set up a VPN connection (which will flow through my own AS) and in case something goes terribly wrong I have the availability to reach everything through the 4G connection. Offcourse this OOB router is locked down as much as possible to only allow access from certain IP Addresses.
Last but not least I added a Dell R630 server which runs some services like Reverse DNS and Monitoring.
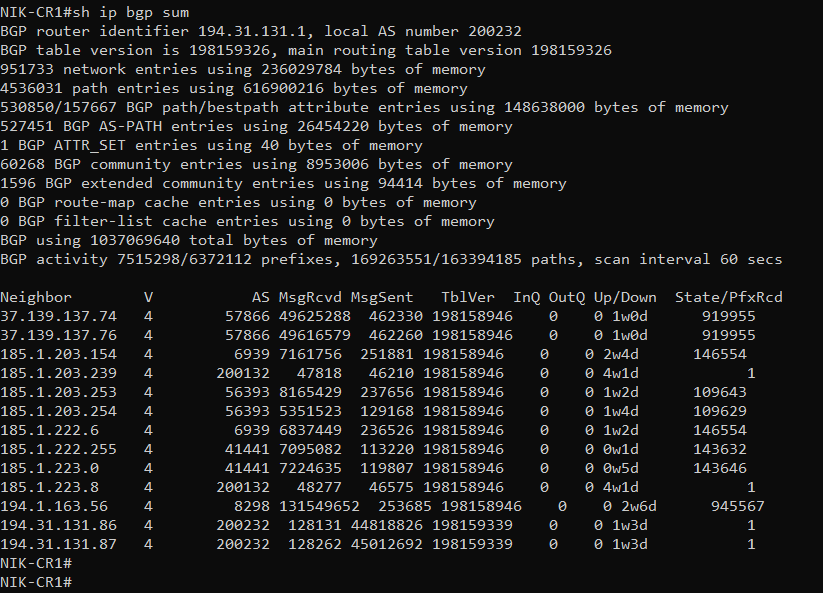
The final setup at this point (May 2023) looks like this:
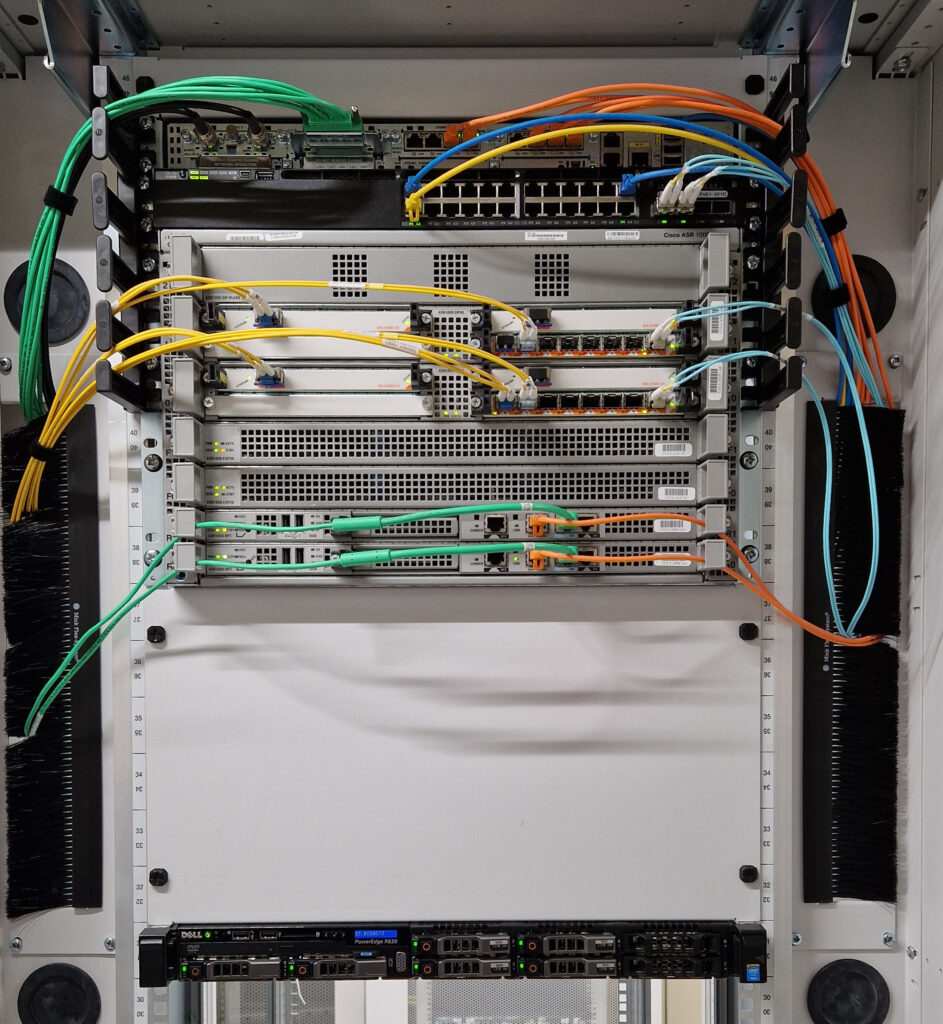
BGP Summary:
6. Connectivity from co-location to home
After all this work the foundation was done and It’s finally time to get all this connectivity to my home / homelab. As that is a story on itself involving more contracts, connections and even physical digging I will save this for Part 2, Coming Soon!
😳😮🤯
I am not generally easy to shock.
But…wow.
How much did all that cost, jeez